Helpdesk Call Management
Learn how to use the integrated softphone to manage helpdesk calls, including login, receiving calls, call forwarding, and after-call work.
Overview
FacilitEase integrates with Amazon Connect to provide a softphone directly within the application. This allows helpdesk agents to receive and manage calls without leaving the FacilitEase interface.

Call Workflow
Softphone Integration: The softphone appears in the top toolbar of FacilitEase. You can minimise it while working and still receive calls when set to Available status.
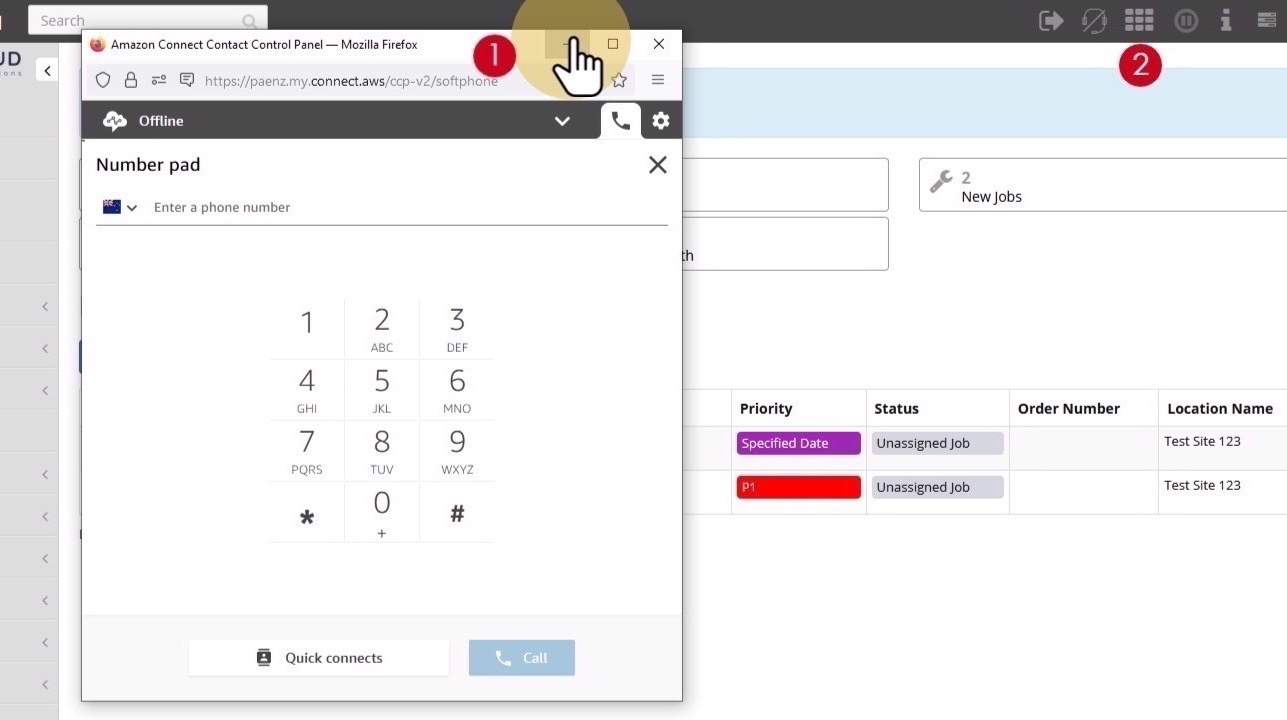
Open Your Softphone
The softphone is accessed from the toolbar in FacilitEase.
- Click the Login Button - In the FacilitEase toolbar (top right area), click the softphone login button to open the softphone window.

Toolbar Icons
The FacilitEase toolbar contains several icons for different functions:
Login to Softphone
You need to log in to the softphone with your provided credentials before you can receive calls.
- Enter Username - Enter your provided softphone username in the Username field.
- Enter Password - Enter your softphone password.
- Click Sign In - Click the Sign In button to authenticate. You can check "Remember username" to save your username for future logins.
Credentials: Your softphone credentials are separate from your FacilitEase login. Contact your system administrator if you don't have your softphone credentials.
Minimise Softphone Window
Once logged in, you can minimise the softphone window to work in FacilitEase:
- Click the minimise button on the softphone window
- The softphone will continue running in the background
- Click the dial pad icon in the toolbar to bring it back up
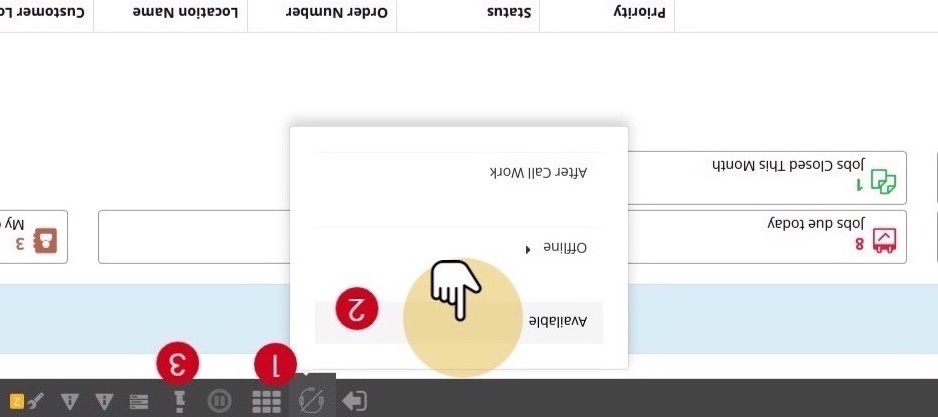
Make Available
Before you can receive calls, you must set your status to Available.
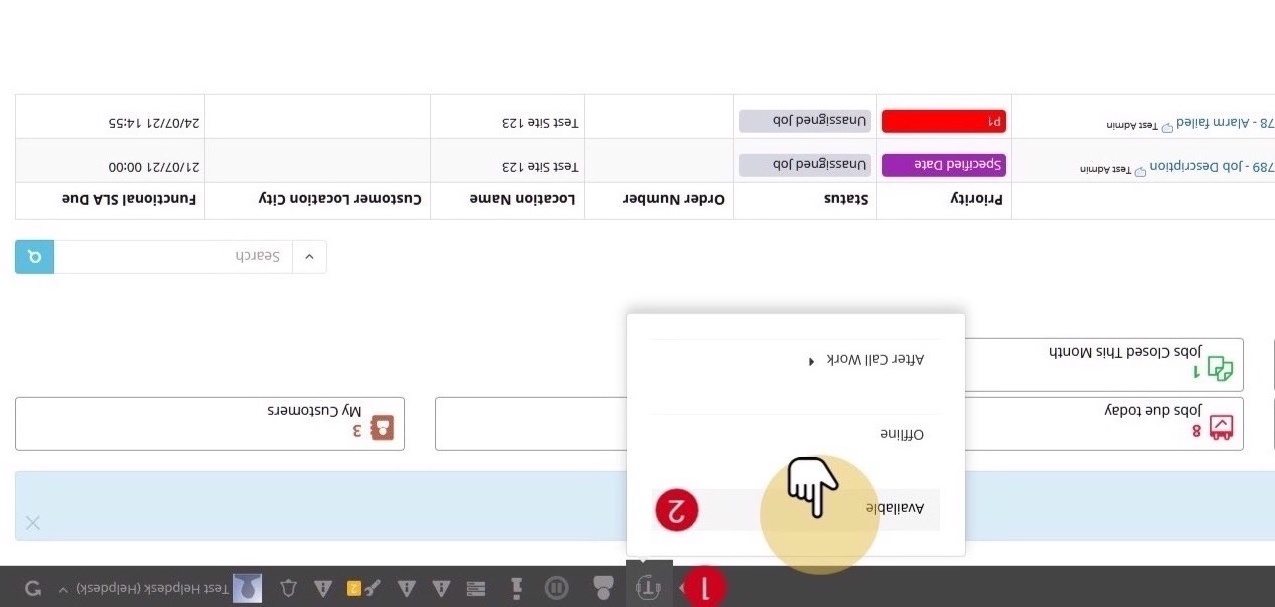
- Click the Headset Icon - Click the headset icon in the toolbar to access availability settings. When available, the headset icon will have a line through it.
- Select Available - Click Available from the dropdown menu to make yourself available to receive calls.
- View Your Details (Optional) - Click the "i" icon to view your login details, Queue, and routing profile information.
Availability Status Options
| Status | Description | Can Receive Calls |
|---|---|---|
| Available | Ready to receive incoming calls | Yes |
| Offline | Not accepting calls | No |
| After Call Work | Completing work after a call | No |
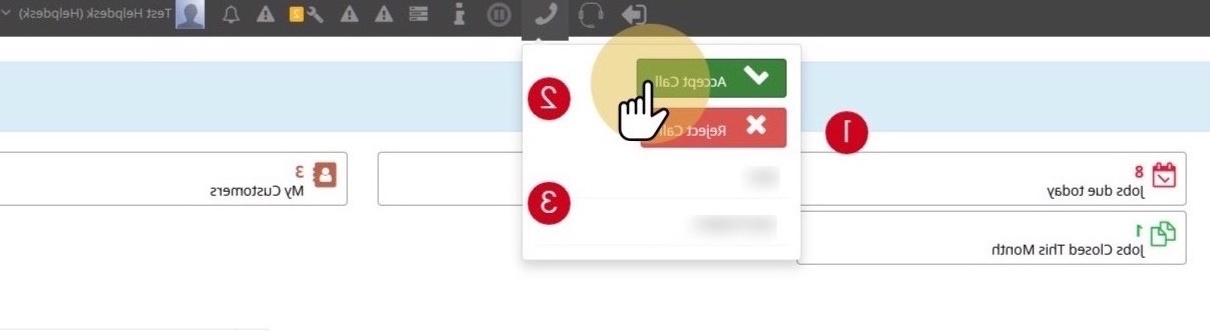
Receive a Call
When a call comes in while you are Available, a popup will appear with caller information.
- View Incoming Call Popup - When you are available and a call is received, a call box will pop up displaying caller information.
- View Caller Information - The caller name and phone number will display if available from the system.
- Accept or Reject - Click Accept Call to answer the call, or Reject Call to decline it.
In Call Controls
Once you accept a call, you have access to various call controls.
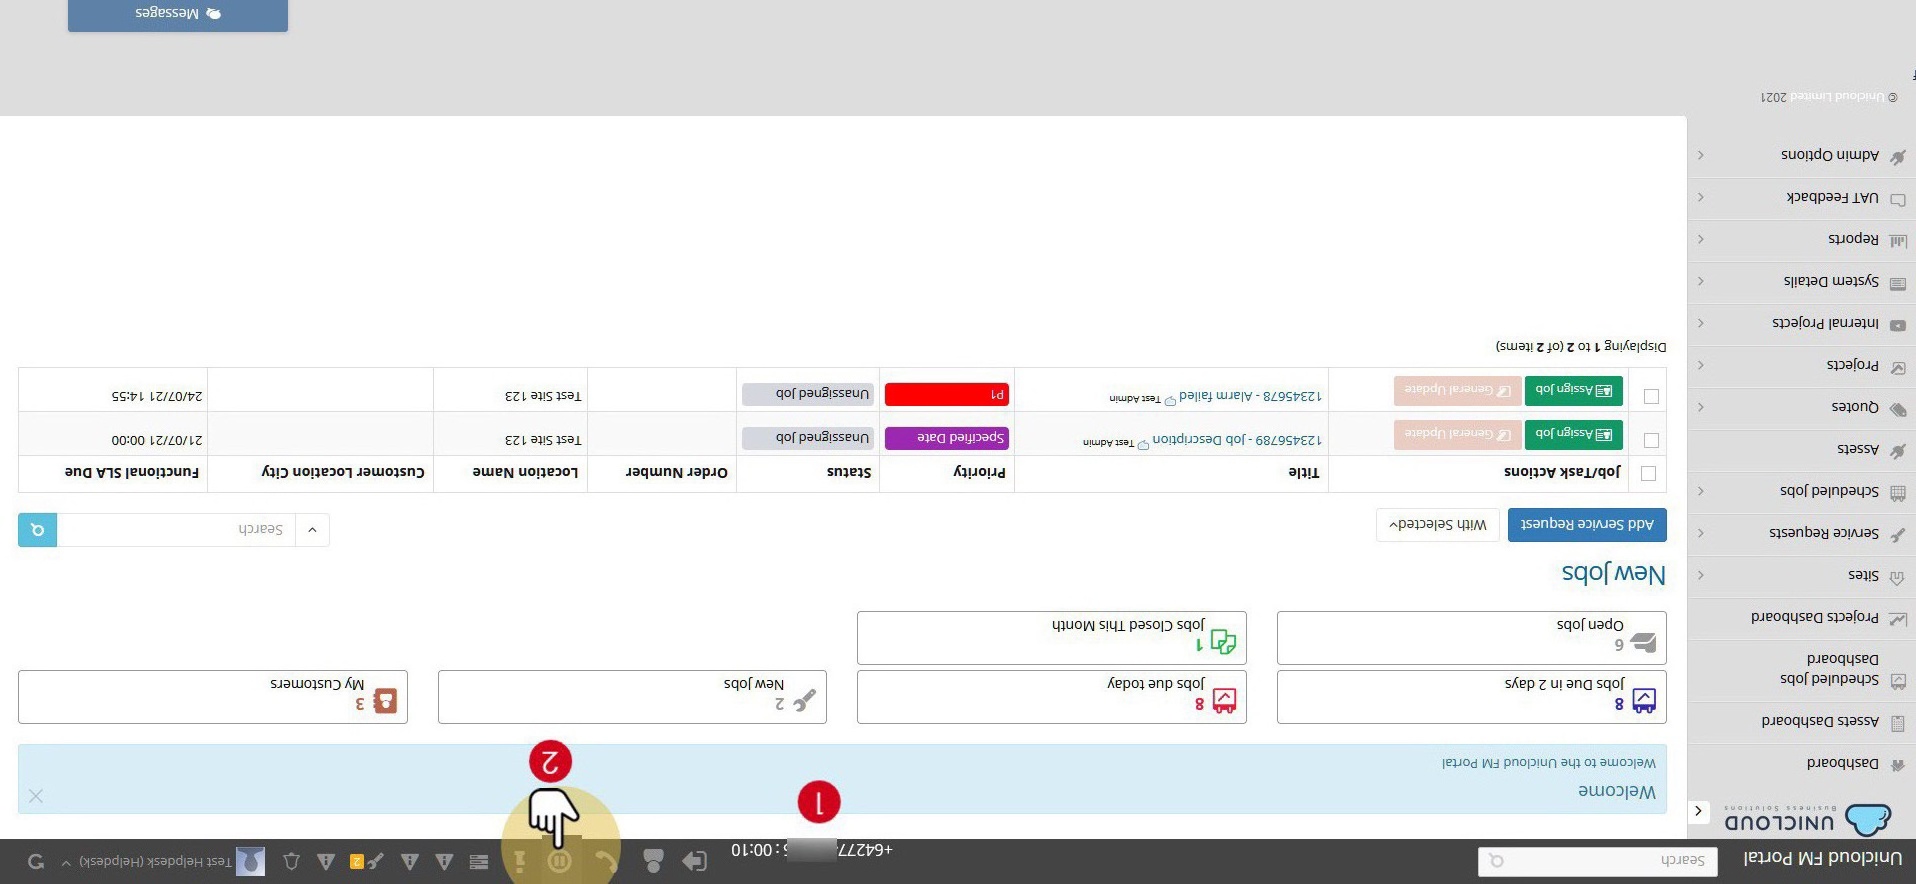
Call Display
When you are in a call:
- The incoming number displays in the toolbar next to the softphone controls
- A timer shows the call duration
- Status shows "Connected call"
Call Controls
| Control | Icon | Description |
|---|---|---|
| Hold | Pause icon (||) | Put the caller on hold. Click the Play icon to resume. |
| Mute | Microphone icon | Mute your microphone so the caller cannot hear you. |
| Number Pad | Grid icon | Open the dial pad for entering numbers during the call. |
| Quick Connects | Address book icon | Access quick connect numbers for transfers. |
| End Call | Red phone icon | End the current call. |
Working During Calls: While on a call, you can continue to use FacilitEase to look up information, create service requests, or update jobs. The softphone controls remain accessible in the toolbar.
Call Forwarding / Make Additional Call
You can transfer calls or make additional calls while on an active call.
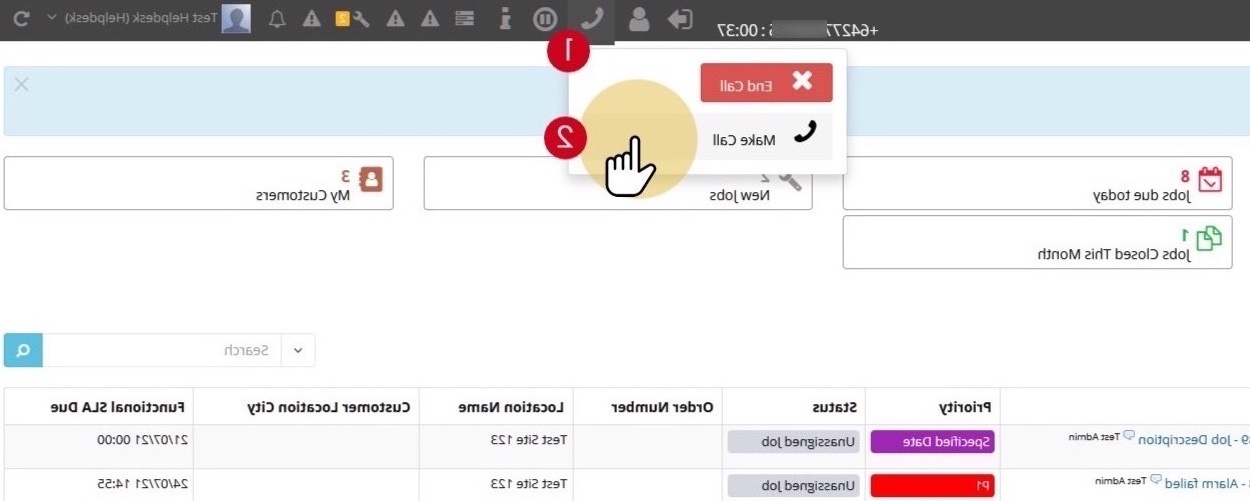
- Click the Phone Icon - While on a call, click the phone icon in the toolbar.
- Click Make Call - Select Make Call from the menu that appears.
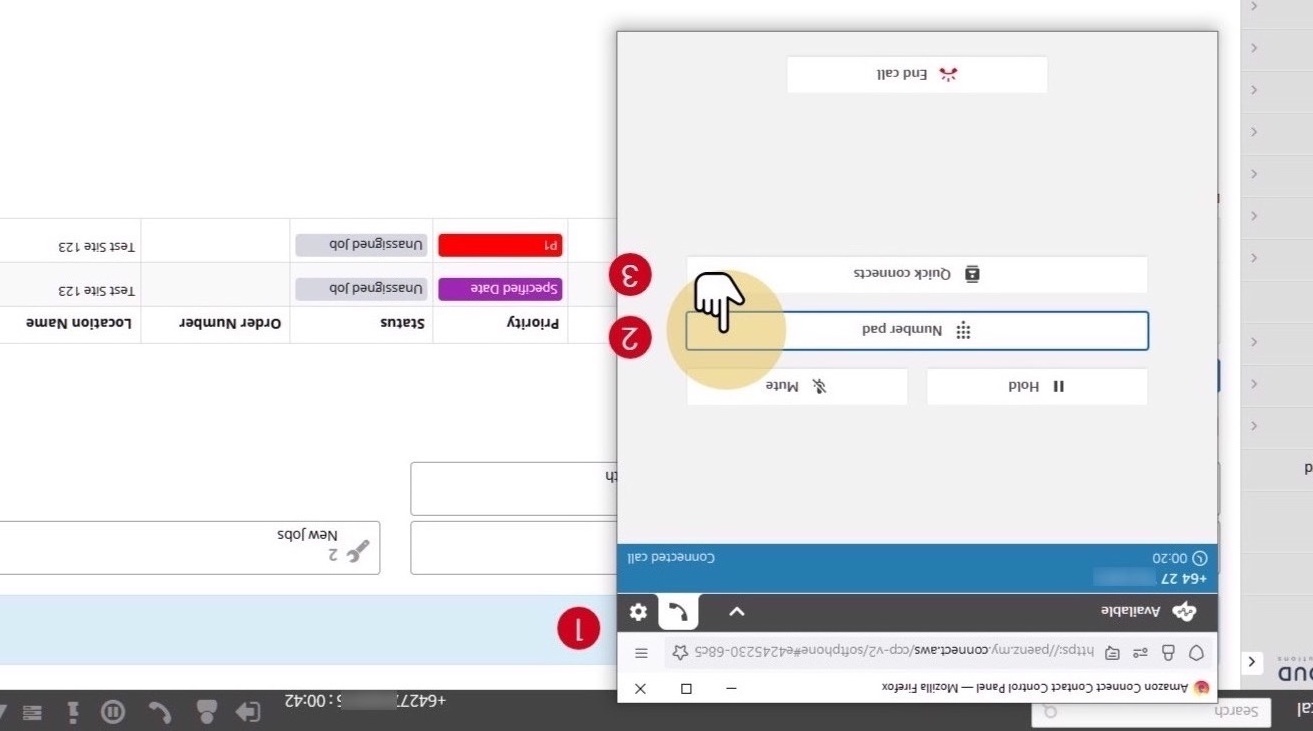
- Dial or Select Quick Connect - You can either:
- Open the Number Pad and dial a number manually
- Select from your Quick Connects list for common transfer destinations
Forward Call
To transfer the call to another person:
- The softphone popup will appear
- Open the number pad and dial the number, OR
- Select from your Quick Connects list
- Once connected, the call can be transferred
End Call
When you have finished the call, end it properly using the softphone controls.
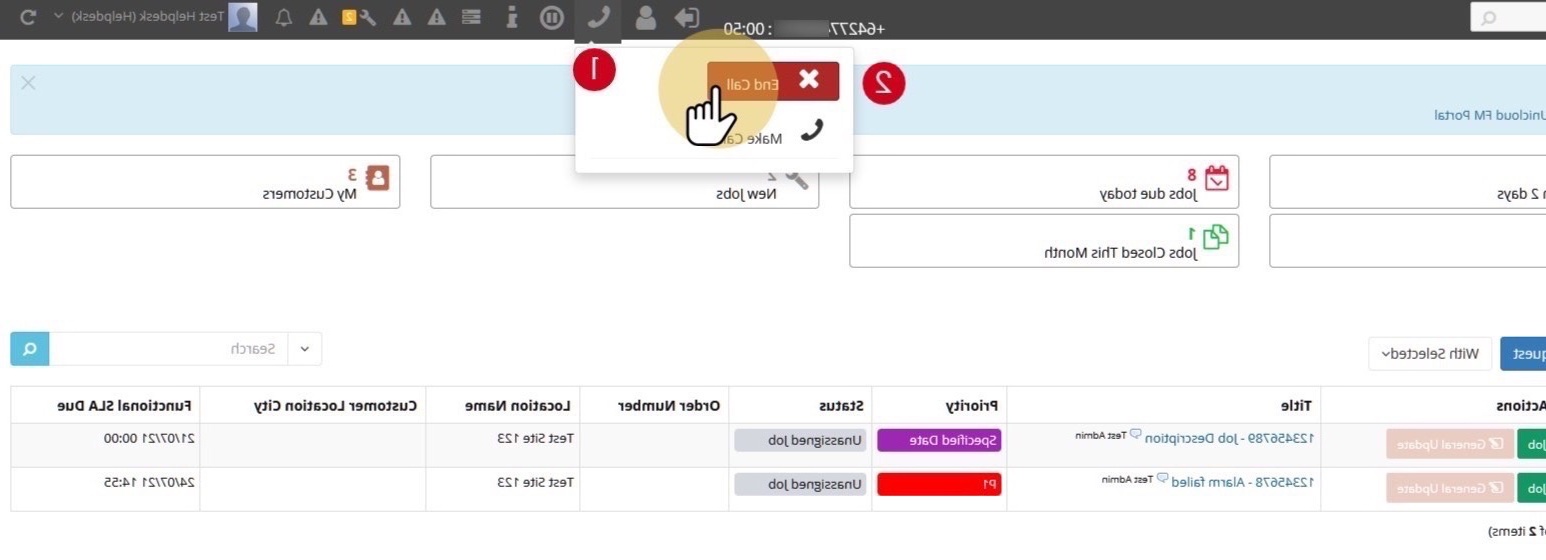
- Click the Phone Icon - Click the phone icon in the toolbar to access call options.
- Click End Call - Click the End Call button to disconnect the call.
After Ending: After ending a call, your status will automatically change to "After Call Work" to give you time to complete any follow-up tasks.
After Call Work
After ending a call, you enter "After Call Work" mode where you can complete tasks related to the call before receiving new calls.
After Call Work Status
- The phone icon will show as a headset with a "T" in it
- You will not receive calls while in this status
- Use this time to log service requests, update jobs, or make notes
- Complete Your Work - Finish any tasks related to the call, such as creating a service request or updating records.
- Return to Available - Click the headset icon and select Available to start receiving calls again.
Remember to Go Available: Don't forget to set yourself back to Available when you're ready to receive more calls. If you remain in After Call Work status, calls will be routed to other available agents.
Status Summary
Available
Ready for calls
In Call
Currently on call
After Call Work
Completing tasks
Offline
Not accepting calls