Add a Team Member
Quick guide to adding a Site Team Member to give them access to view service requests and jobs at specific sites.
View-Only Access: Site Team Members have view-only access. They can see service requests and contractor jobs at their assigned sites but cannot create or modify records.
1. Creating a New User
To add a new Site Team Member:
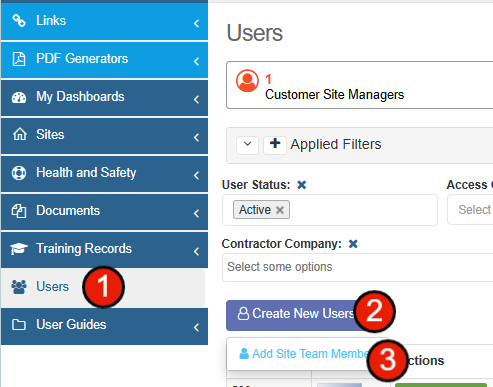
- Select Users from the main menu
- Hover over Create New Users
- Select Add Site Team Member
2. Adding User Info
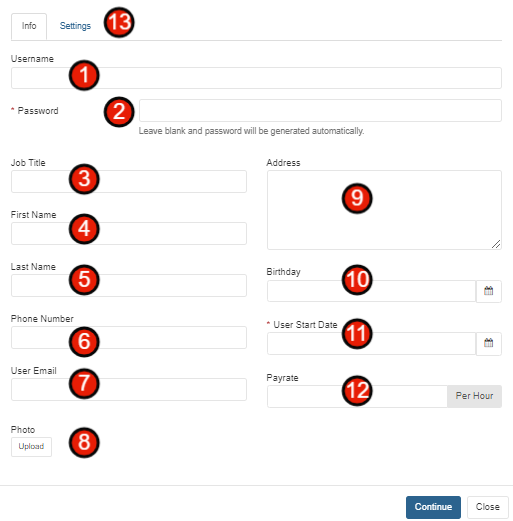
Complete the user information form with the following details:
- Username - Add a username for the user
- Password - Leave blank for auto generation or apply one for the user
- Job Title - Add job title (Optional)
- First Name - Add the user's first name
- Last Name - Add the user's last name
- Phone Number - Add phone number (Optional)
- User Email - This email address will receive the Welcome Email and login details
- Photo - Upload a photo of the user (Optional)
- Address - Add user address (Optional)
- Birthday - Add birthday (Optional)
- User Start Date - Select the user's start date
- Payrate - Add payrate if using Rosters
- Settings Tab - Go to the top and select the Settings tab
3. Selecting Settings
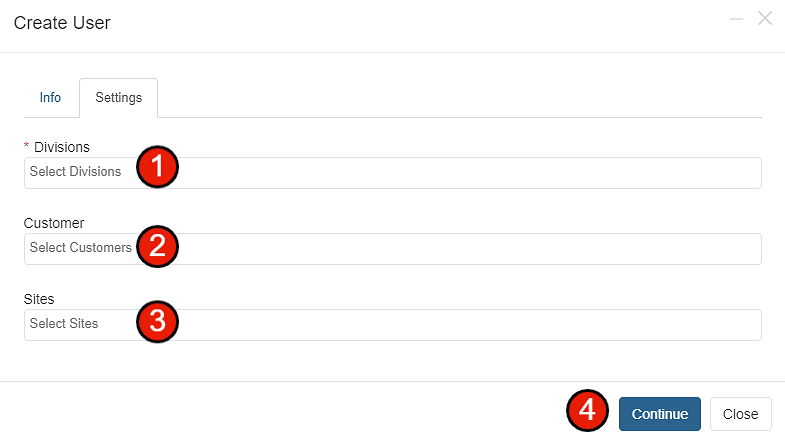
Configure the user's access settings:
- Divisions - Select the division(s) the user should have access to
- Customer - Select the customer account
- Sites - Select the specific sites the user can view
- Continue - Click Continue to complete the setup
Tip: After clicking Continue, the new team member will receive a welcome email with their login details at the email address you provided.